
Shooting portraits in natural light, if you get it right, can be very rewarding. You can easily create beautiful, moody, and very natural photos—with just a camera in your hand and a willing subject in front of you. Here are some thoughts that may help you get the best possible results.
I’ve spent decades shooting portraits—environmental portraits in particular. It’s probably my favorite type of photography. In order to do this, I’ve always carried lighting with me. A lot of the time, I turn up to a location without knowing what to expect, so I have to go prepared. It’s always a fun challenge to light a scene, but the first thing I like to do is see if I can make a great photo just using natural light. If I’m in an artist’s workshop, can I place them by a window? Can I position a store owner in the doorway?
Carrying lighting is fine if you can get somewhere by car. But if you’re doing a lot of walking, it’s a pain. Sure, you can carry a couple of smaller LED lights or flashes in a backpack, but usually not much else. Yet still, many scenarios make using additional lighting problematic. Travel photography is my biggest challenge. In a busy street or at a tourist attraction heaving with people, messing about trying to set just one light up can be impractical.
Let’s look at a few considerations when working with natural light.
Different Types of Outdoor Natural Light
Golden Hour
Arguably the best kind of natural light for many photographers. Low, warm light is favored for emotive, romantic portraits—a favorite quality of light for wedding and engagement photographers.
The light can be very soft and flattering. A popular technique is to position the sun behind the subject for a glowing look. Backlighting hair and rim lighting can create some glamour.
Things to Consider:
-
The downside is you have to work fast, as it doesn’t last long.
-
Make sure your subject isn’t looking toward the light to avoid squinting.
-
You may need to overexpose your shot to avoid ending up with a silhouette. A white reflector can be a useful accessory to add some fill light.
-
In warm light, don’t have your white balance set to auto—you’ll lose those lovely warm tones. Set your white balance to “daylight,” or manually enter a Kelvin value. 5,000 to 5,600 K is a good starting point.
-
Avoid including the sun in the frame unless you want to use lens flare creatively.
-
Consider a gold mist filter to really exaggerate the soft, warm light wrapping around your subject. A mist—or diffusion—filter can create lovely highlight roll-off and make things look more natural and organic.
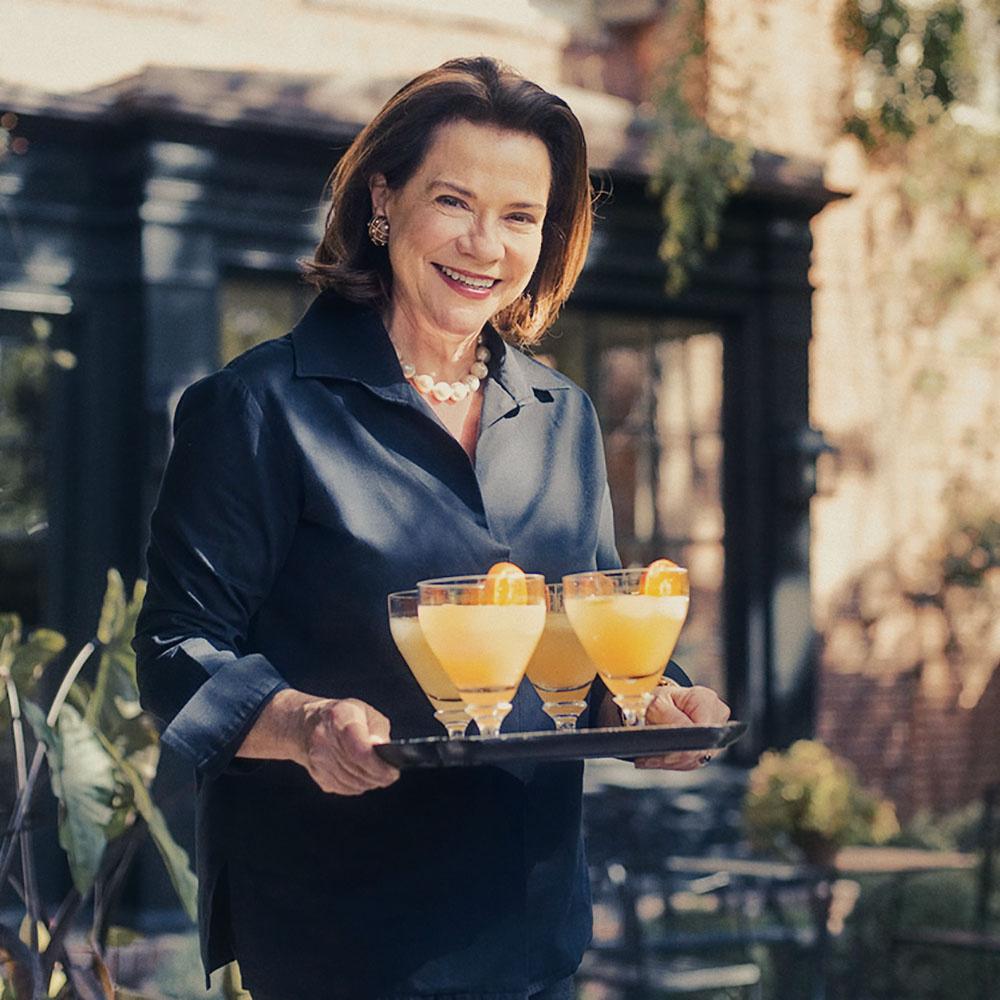
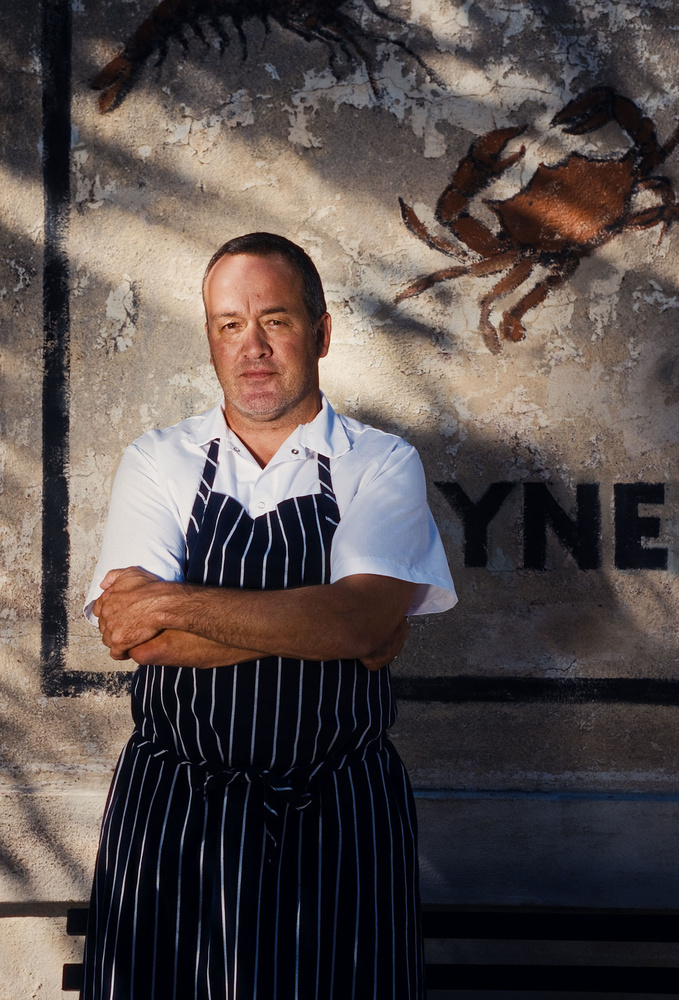
Bright and Sunny
Many photographers hate bright, harsh midday sun. It can be very unflattering, and the shadows can look awful. This kind of natural light is a constant challenge for travel photography. Midday sun is the worst, creating unflattering lighting and casting strong shadows under a person’s eyes, nose, and chin.
But we can easily embrace harsh light and work with it.
Things to Consider:
-
Find open shade to eliminate the shadows. Position your subject at the side of a building, in the shade—or maybe under an archway or in a doorway. A tree works well if there are no buildings.
-
While in shade, you can use the bright light outside of the shaded area to your advantage. Position your subject toward the bright light if you want to show detail and get a catchlight in their eyes to bring the image to life. Or maybe turn them 90 degrees or so to sculpt with light and create some depth.
-
You can use a bright wall as a giant reflector. Even if your subject is not in shade, a light-colored wall can be used creatively.
-
If you don’t mind carrying one, a 5-in-1 reflector is a useful accessory. They have a soft diffusing fabric that can be held between the sun and the subject to soften harsh, direct light. Alternatively, they can be used as a reflector. You typically have white, silver, or gold to choose from. These are often used for portrait sessions at the beach, where there is no other option to control harsh, bright light.
-
Why not embrace the harshness and shoot high-contrast black and white? Just be aware of where the sun is. Even moving your subject an inch toward or away from the light can make or break the shadows cast.
-
An ND filter can be a handy accessory in bright light if you want to shoot with a fast lens wide open.
-
Using your lens hood is a good idea for best results.
Nighttime
Portraits outside at night open up some fabulous creative opportunities—well, if you’re in an urban area, at least. You can use lighting from buildings and street lamps. Colored neon signs, in particular, allow for some dramatic, colorful photos.
Okay, so this isn’t actually using natural light—it’s more accurately using ambient light. The point is, you can shoot great portraits at night without using your own lighting.
Portraits shot at night can be sexy, cinematic, and mysterious.
Things to Consider:
-
Street lamps create moody, directional lighting. Big bonus points if there’s mist.
-
Neon signs are perfect for colorful, dramatic portraits.
-
Storefront windows are basically one big soft box.
-
Consider shooting with the main light sources behind your subject or placing them at 90 degrees.
-
Light sources at night usually require placing your subject fairly close to them, as darkness limits falloff, quickly sucking up light.

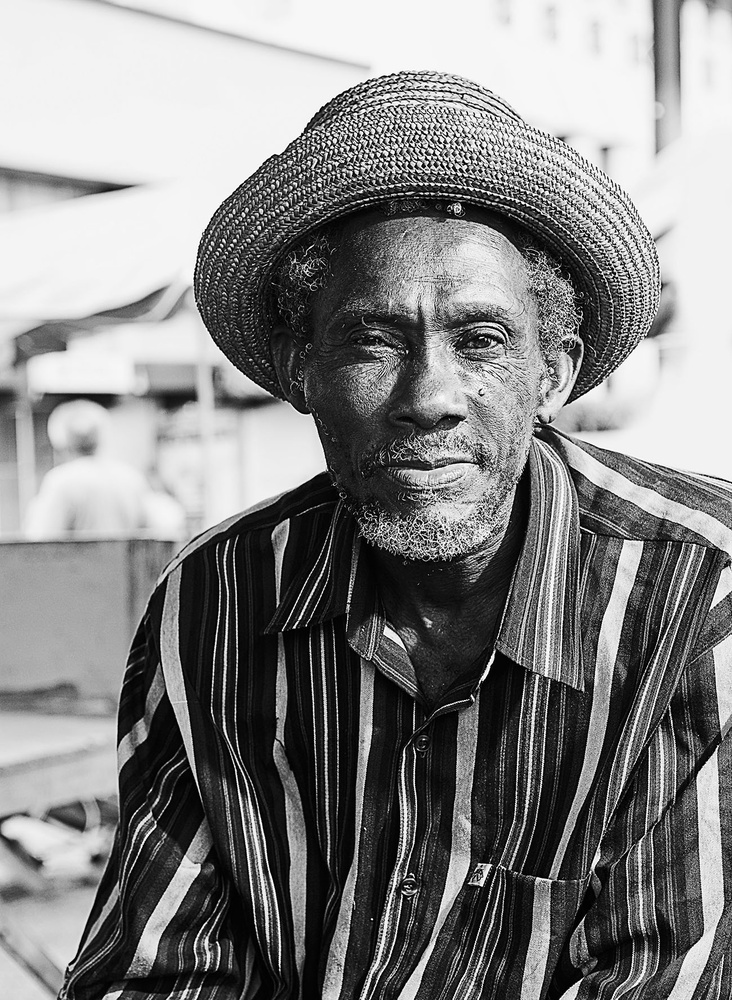
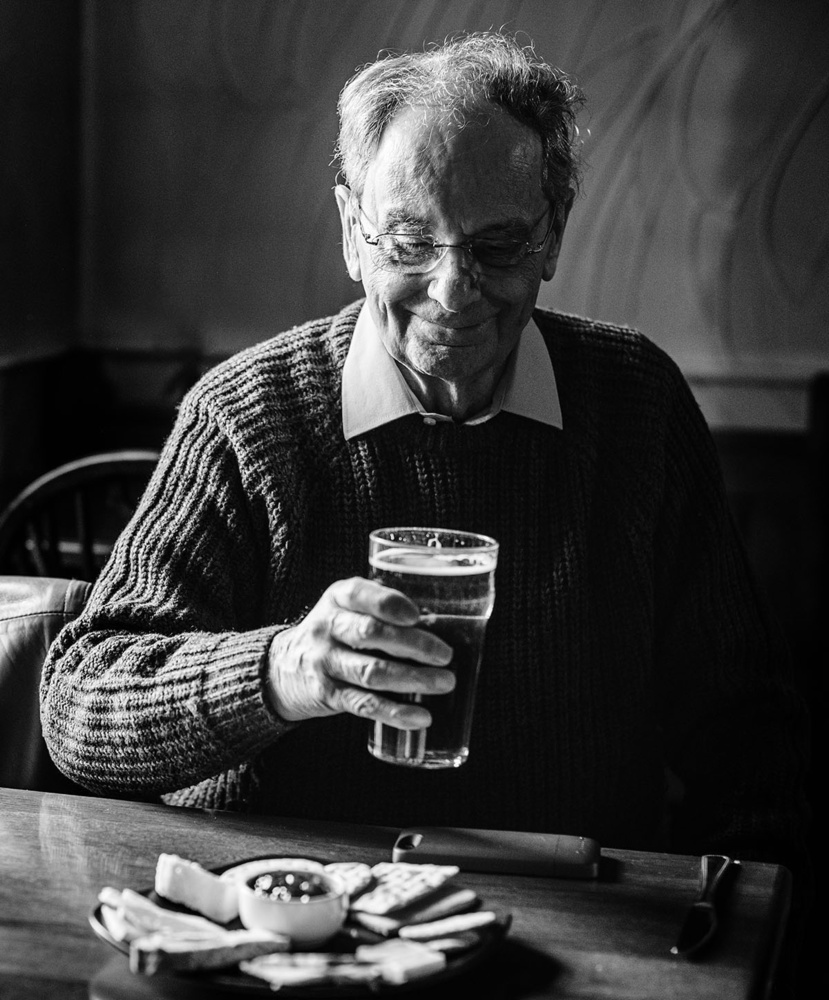
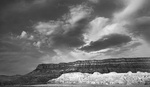
Overcast
I’ve saved the best for last. I believe shooting portraits in overcast natural light is very underrated. There are no better conditions for a portrait photo, in my opinion.
Clouds act as one giant soft box. Diffused light wraps beautifully around your subject and can be manipulated for different results by simply positioning your subject at the right angle.
An overcast day is the best time to shoot someone inside by a window or in a dark doorway and sculpt the light.
Things To Consider:
-
Soft, diffused shadows smooth skin and minimize blemishes, so it’s a good time to go in for that close-up shot. Perfect for glamour and fashion portraits.
-
Diffused light means less dynamic range, so there’s less chance of crushing blacks or clipping highlights.
-
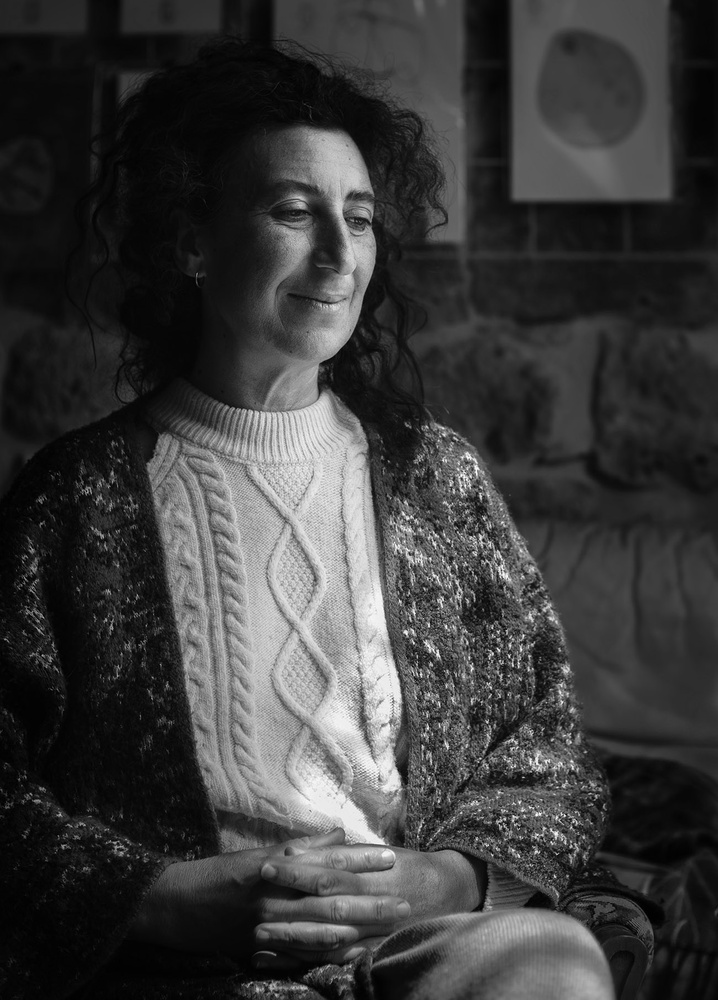
I find soft overcast light is best for documentary and environmental portraits where you’re telling a story and showing context.
-
You can enhance your story. Face your subject toward the light for flat beauty lighting, or turn them away to create a sculpted face. You can achieve subtle Rembrandt lighting in the right conditions.
-
When the light is flatter, you often need to create contrast by placing your subject against a dark background. This is actually a very important consideration—something I do more often than not when shooting in black and white.
-
If you’re shooting color, consider how you use color to create contrast between the background and your subject. For example, a deep red top on your model standing against a dark green background.
I shot some portraits recently at a Farm Show, working with mostly overcast conditions outside, to great effect. You can watch the video from that shoot below.
Natural light is free—what’s not to love? Is it your favorite light source, or do you prefer to use your own lighting?


When it comes to golden hour, putting the sun behind the subject is popular but I think that simply having the low sun light the subject is often overlooked.
Personally, I prefer to have the golden hour sun lighting the subject. It's some of the best light available. You can have the subject angled just off of the direct sun and it's easy to keep from squinting.
These photos were all taken between 30 and 40 minutes before the sun dropped behind the horizon, and the subject was facing, generally, into the light.
Fantastic images. Do you ever haul flash units and softboxes out into the landscape for portraits... or do you work solely with natural light?
Thanks. I always have a flash and softbox (as well as a scrim and reflectors) with me in case I need it or want it. Using a strobe is my comfort zone. However, a couple of summers ago I purposely avoided using it to simply get used to working with and adapting to the natural light. Now, in outdoor sessions, I rarely use a flash except for specific situations.
Ah, i'm one of those people who like low sun at golden hour shadow side. And I like using a gold mist filter to make that like bloom and glow. Lovely photos Daniel.
Timely article, Simon, given the contest theme this month. In fact, there are two natural light portraits in the contest that would give me reason to throw out all the flash that I own, which is not much, but it's amazing what these photographers have done with natural lighting. Here are the two of which I speak:
https://fstoppers.com/entry/708341
https://fstoppers.com/entry/708190
I can understand the black and white photo a bit better because the person is positioned close to the window and there's a lot of contrast. For the color photo, the photographer must have worked some real magic with reflectors, and probably some editing in Photoshop, to get such overall well-balanced light throughout the whole room. Colors are all well-coordinated too.
As I've mentioned before, I love portrait photography, and if I were a lot younger would definitely aspire to make it my career. Such a lengthy learning curve though gives me reason for hesitating. As it is, I get a chance once in awhile with family or friends to play around with portraits. Headshots for business don't count for much... only enough to make me realize how stressed I can get when flash units are involved. Everything seems to change when I bring lights to a client's location, and you have to be flexible and experienced enough to handle the unexpected... which I am not. Results have generally been good, although anytime I can take advantage of natural light, I much prefer to do so. Flash just seems like something that absolutely requires a lot of experience... something where flash settings and positioning become second nature.
My favorite subject is the only person in the world with enough patience to let me experiment for about as long, and in any manner, that I wish – as in wrapping her up in aluminum foil to take her picture... my wife. The photo of her here is in front of a north-facing window. Of course, seeing the quality of light is not so much different from one genre to the next... plants and flowers appreciate soft light. But posing your subject brings entirely unique issues, with huge challenges that you just don't grasp over night. Light seems like the easy part of portraiture to learn.
That's a fabulous portrait of your wife Ed. The two things that can help control and sculpt natural light are a sheet of white foamcore, and a sheet of black foamcore. These help control shadows and fill light. Flash is not needed all the time you have a natural light source, and windows are the best, which looks like you used with your portrait above. A willing model is essential to allow one to experiment, so you're very lucky in that regard!
Other than the benefit that there are no buttons or electronic controls to manage with a piece of foamcore, I've found them sort of cumbersome and unpredictable. Without an assistant, I'm trying to juggle the camera with a timer and the foamcore at the same time. It's almost like you need a stand to mount them on, but that impacts the fluid nature of some portrait sessions. Reflecting light with foamcore sounds like a good subject for an Fstoppers article.
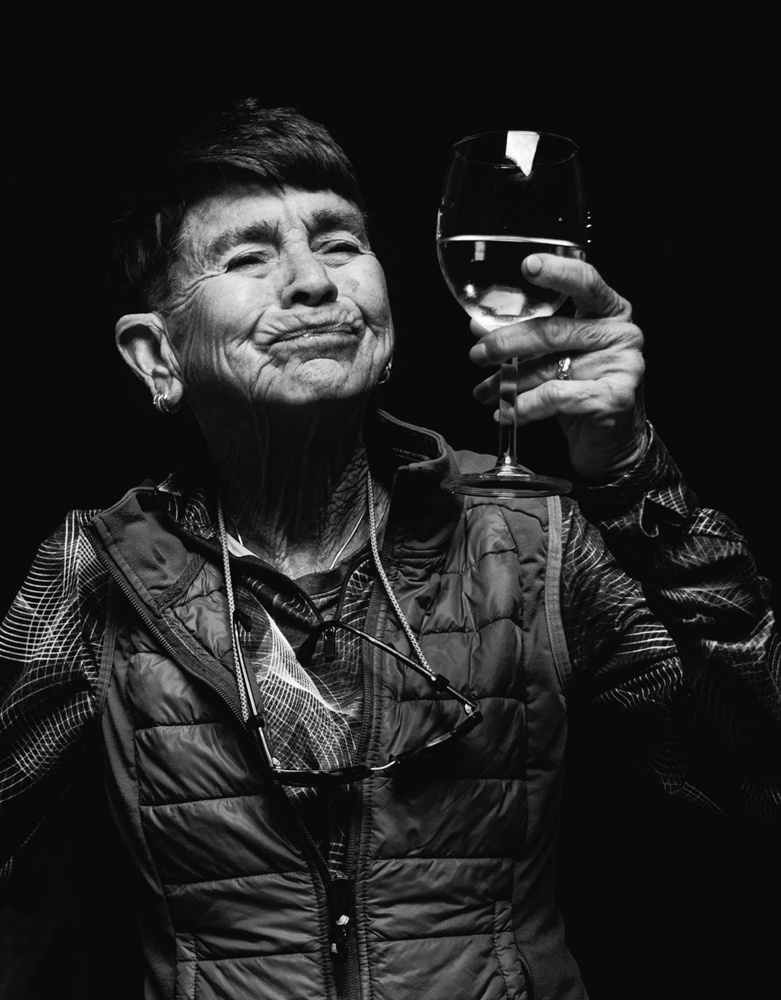
Reviewing a couple of your photo examples, the black and white photo of the man holding the beer or some sort of drink, and the woman with her hands folded, both look like lighting similar to the shot of my wife. In each case, the light illuminates the subject nicely, with rapid fall off into deep shadows. Loads of contrast. I can see how some sort of reflector could open up the shadow detail in each of those pictures. However, is it necessarily desirable, and secondly, how much does setting up a reflector stifle the spontaneity between you and your subject, the same way a tripod has that effect?
The rapid light falloff is due to the background behind the subject being dark, and obviously a black sheet of foamcore gives the sane result. This is always my desired result, as I love high contrast images.
I have a small lightstand with a clip on it to hold foamcore. and once I've figured out where to place the subject and set up the stand, I don't find it distracts in any way. I always chat a lot to people and get them relaxed. Same deal with an off-camera flash or continuous light source, as demonstrated in the embedded video.
Thank you for another useful article, Simon!
As a wildlife photographer, all of my portraiture is done with natural light, as I do not know how to make a flash work with my camera. So pretty much all of my shooting is done without any artificial lighting and I rely solely on the ambient light for my portraiture.
Ambient light is not a choice for me, as there are no other options available. So I have to make it work with the light that nature provides. This means that I have to not shoot for long periods of time during sunny days, and can only get pleasing images during the first couple hours of daylight and the last couple hours of daylight.
I often plan my photo outings for times when the weather will be overcast during mid-day. For instance, I am really excited about the opportunities to shoot American Pikas locally at this time of year, but the weather is predominantly sunny, so I look at the extended forecast to see when there might be an overcast day, or at least a partly cloudy / partly sunny day. This means I have only been able to go out and shoot twice during the past two weeks. But they are predicting some cloudy conditions on this coming Friday, so I may be able to get out and shoot some Pika portraits again soon!
Golden hour is great (of course). BUT ...... Pika and some other species live in specific locations in the mountains, and in most of these locations, there is no golden hour. No sunrise. No sunset. The mountains block the sun until it has already been up for hours, so the first sunlight that most of the Pika fields see is already high, harsh light. Also, even if there was golden hour light on the Pika, well, it is a two hour drive to get to where they are, so a 4 hour round trip. It is hard to justify that level of effort and expense for just an hour and a half of shooting (after which time the light gets too harsh for pleasing images).
That's interesting info about shooting Pikas in the mountains, thanks Tom. I tried shooting them in the Canadian Rockies many years ago, but wildlife photography was a genre I dropped because of lack of time.
Pikas or people, natural overcast / diffused light is the best, but I guess it's difficult to ask a Pika to move its head around slightly for optimal results!